In January, I made a case for artists to print their own mini-comics. To follow up, I want to show you how to print a color cover for your black and white interior — thus giving your mini that touch of class and handmade grace everyone looks for in a well made mini. The initial set up costs are a little more, but it's so much fun! Besides, afterwards you have some more classy tools for your utility belt.
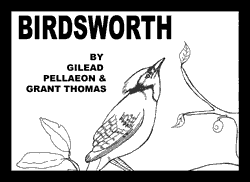 What we are going to do is print a simple block print cover. There are many ways to make a block print that can be quite elegant, but can also end up pretty time consuming and frustrating, so we’re going to use a simpler process that will give us pretty good results. It may not end up looking like a Japanese ukiyo-e print, but it will still be very classy and professional.
You could buy a real linoleum block instead of a woodblock, but then you would need some way to secure it to your working surface (with a bench hook or clamp). But we want to keep this simple, right? Speedball has developed a material called Speedycut that basically looks and feels like a giant vinyl eraser, and can be cut with regular Linoleum cutters. Plus it sticks to the table so you don’t have to worry about it sliding around while you work. All that and it’s cheaper!
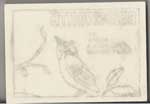
You can draw your image right on the surface of the Speedycut. I designed my image first on some scratch paper and then transferred it to the printing block by rubbing pencil on the back of the design and putting it on top of the block and tracing the lines so that the graphite is transferred to the block. Remember that any text you use will need to be in mirror writing so that it prints the correct way!
Here it is when it is done:
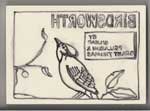
It looked hard to read, so I went over it again with a Sharpie:
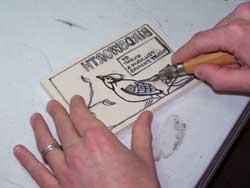
Next I begin cutting around the edges of my figures and letters. I’m leaving in all the things I want to print and cutting out the places I want to stay white. One thing to keep in mind is that you can cut in the direction of your shape so that if you happen to get a little bit of ink in the cut-out negative space and it prints, it still looks like it fits in with the image. So even though I want Birdworth’s tummy to be white, I’m cutting out the space to go with the curves of his body.
Here’s the finished block ready for ink:
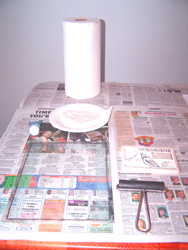
Next, I bought a scrap of glass from a window store for under five bucks. This is where the ink will be prepared. Be sure to put duct tape around the edges of the glass to prevent an accident. Then, you’ll need a brayer and some ink. I’m using Speedball water soluble ink ($3.83), because it cleans up easier in my home, but the oil based ink looks better. If you’re in a place where you can clean up oil based ink, I suggest you give it a try.
First, squeeze out a line of the ink onto the glass. Next, take the brayer and roll it out across the glass so that the ink is evenly spread out.
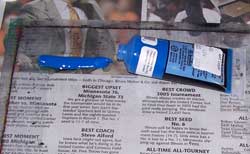

When you hear the ink making a tacky sound and the brayer rolls across the ink, you’ll know its spread out evenly enough to give you a good print.
 I’ve covered my table with local newspaper so I don’t get it all messy. (That’s about all that paper is worth since they don’t cover Diesel Sweeties!) I have a damp paper towel in case I get ink on my hands. That keeps the fingerprints off the final work.
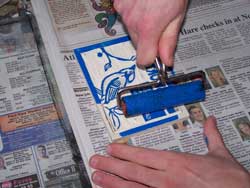
 I roll some ink on my brayer and my two horizontal passes on my block and then two vertical passes. This will ensure the ink is on every part of the image. If you get a little on the paper underneath the block it's okay, because you can then move it over to a clean part of the table for the actual printing.
I move the block over so I don’t get stray marks on the print and then I press the paper into the block being careful not to smear as I go. I printed on white paper first to test it out. This is called an “Artist Proof†and you can see I’ve already screwed up. Good thing I didn’t do that on my fancy colored paper right?
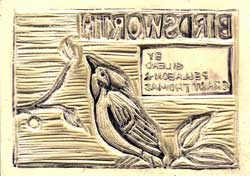
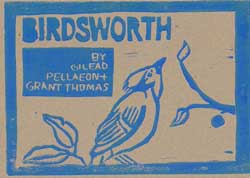
Here’s the final print. The blue ink looks real classy against the brown paper doesn’t it?
Here’s a little breakdown of the costs:
- Glass: $5
- Speedy cut: $4-$10 (depending on size of block)
- Brayer: $5
- Linoleum Cutter: $10
- Paper: $0.15 ea
- Ink: $4-$7
(Visit Speedball's website for more products.)
There you have it. Once you have the tools you can make many different color prints very cheaply in your own home and without a press.
Comments are closed.